
Ade Chapmanlaw’s description of the replacement of the stern gland, prop tube and cutlass bearing on Tig (F24) during the Spring of 2021:
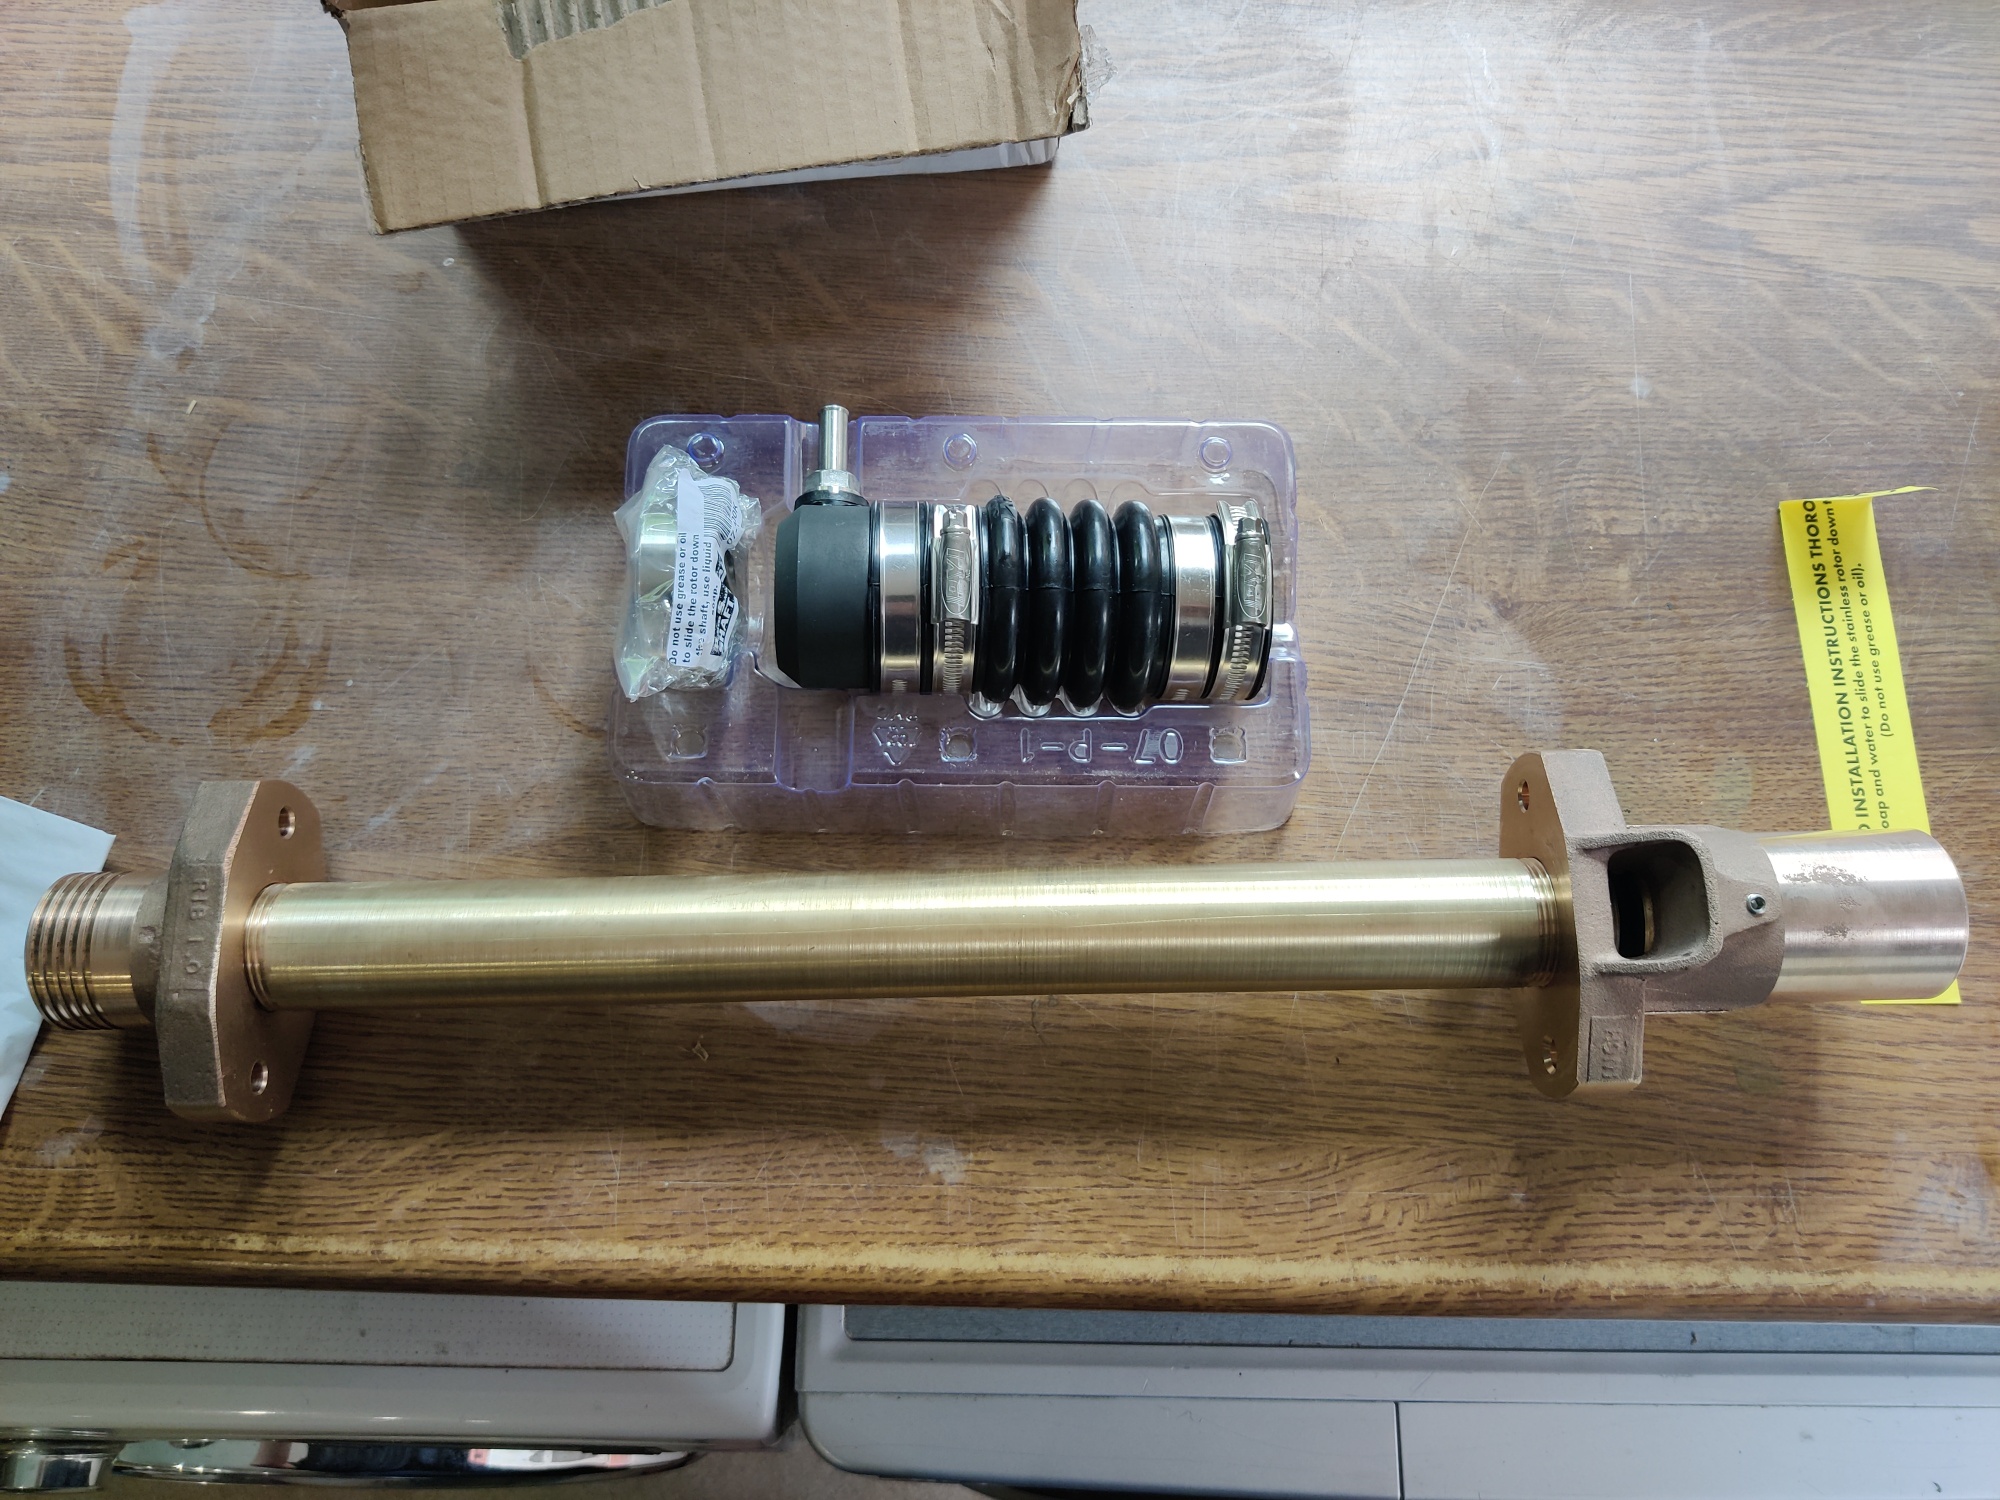
The new parts. The new gland is the grey (graphite) ring in the tray, attached to a rubber boot. The boot fits onto the inner end of the tube (left hand end as shown). The cutlass bearing fits onto the outer end of the tube (right hand end); the housing for this has large water inlets.
The stern gland on Tig was leaking a lot after our rough trip out to Studland. It looked like I was going to have to strip the shaft out and reseat the cutlass bearing and packing gland as the leak was coming from round the outside of the tube.

The old tube and gland removed. The cutlass housing broke off during removal; it can be very hard work to remove.
The old screws that held the gland and cutlass bearing holder on were all knackered so I needed to rotate both ends to get the new screws into fresh wood.
The inner fitting, rotated to provide sound wood for its screws.
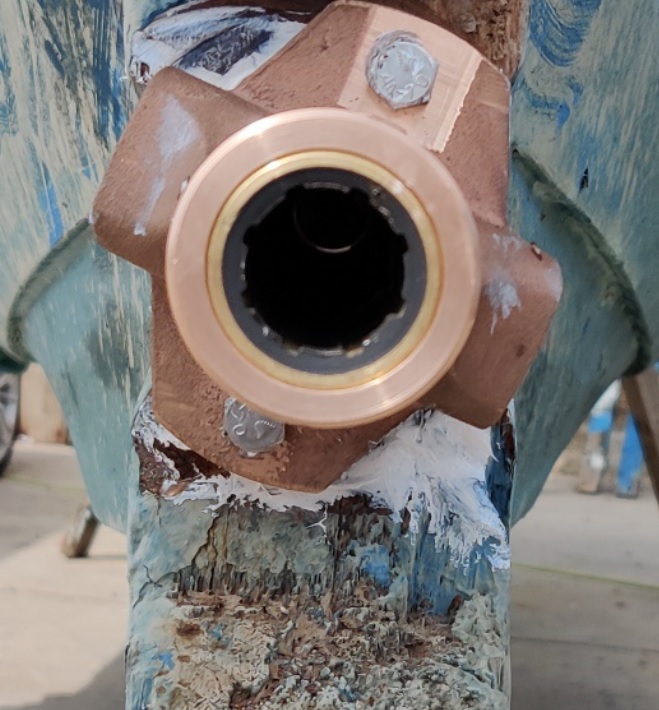
Cutlass bearing inserted into its housing. This was also rotated to find sound wood for the hex head screws.
New cutlass holder has absolutely massive water inlets on it. This is important as it keeps the cutlass bearing lubed and cool. If you have the original on your finesse, I highly recommend checking your holes are clear. They are small and easily clogged.
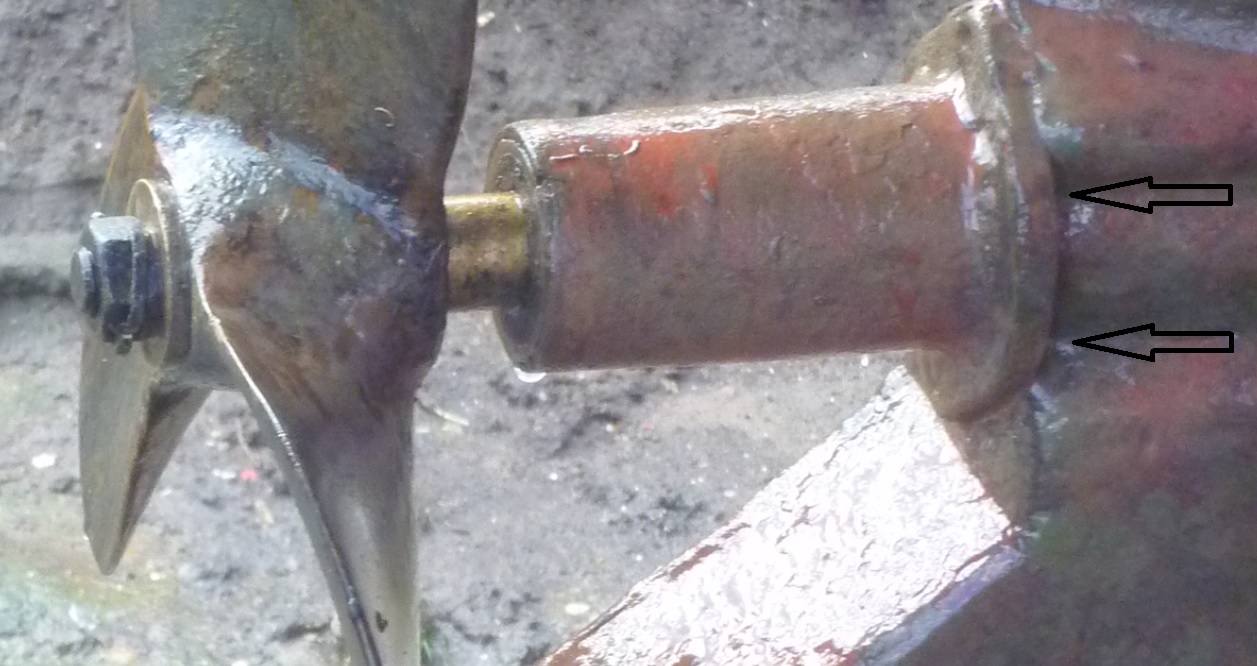
Water inlets for the cutlass bearing are on the front face of the housing flange, as indicated. Nick suggests making sure antifouling paint does not run into the lubrication channel inlets. He pushed ear cleaners into each to stop slurry blast going in during bottom cleaning. A piece of wire can be used to fiddle holes clear and then sluice with water.
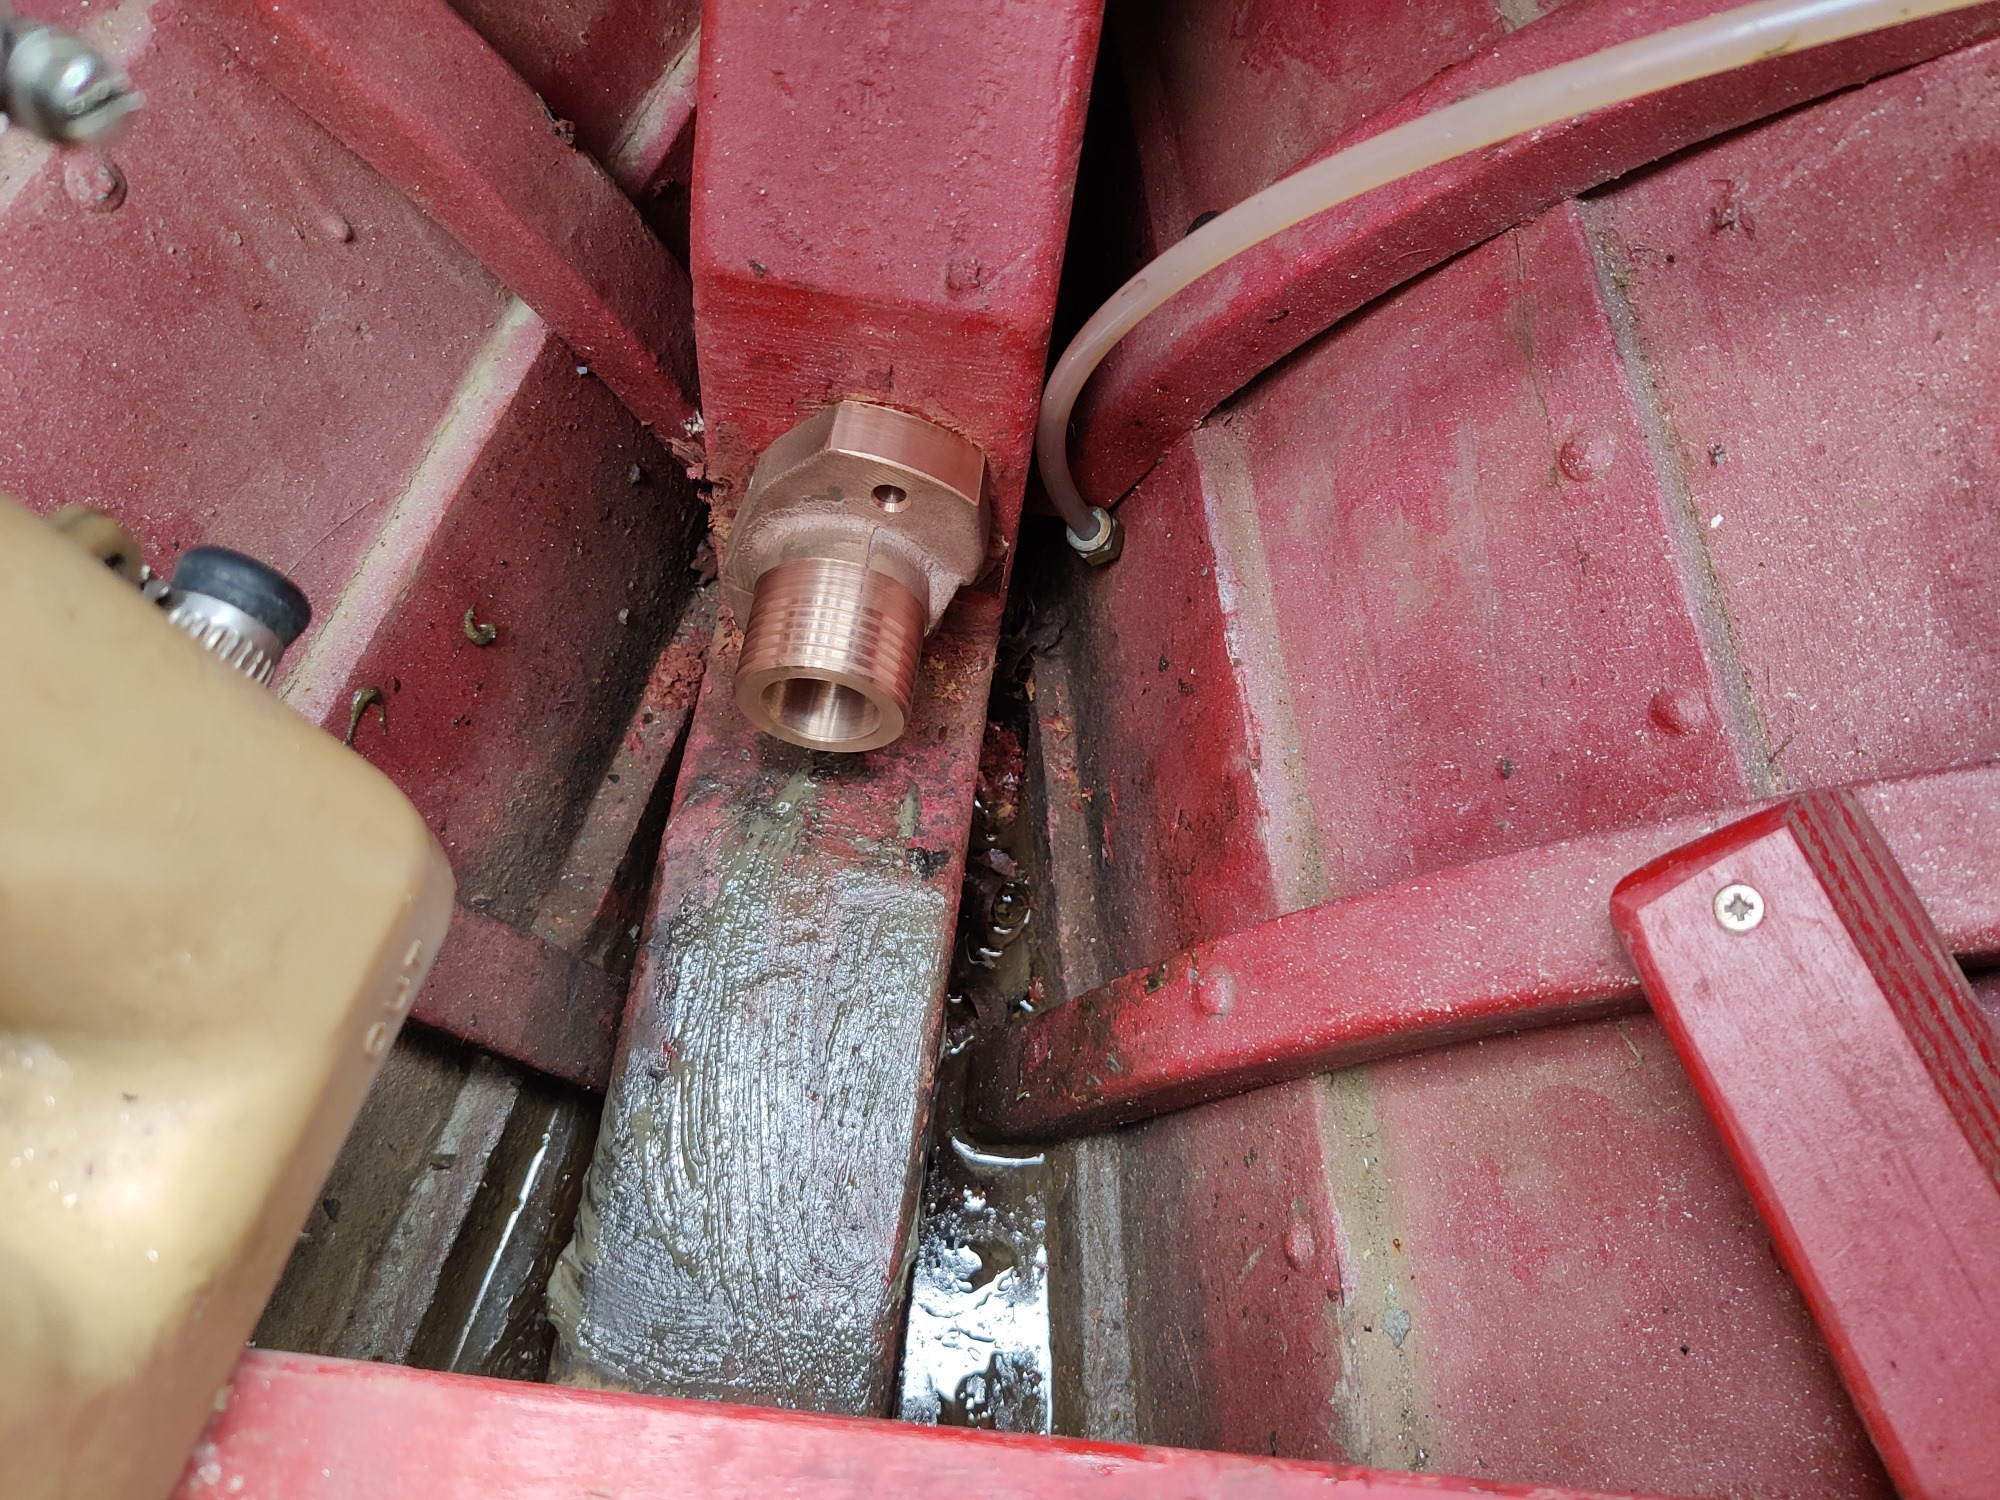
New tube fitted with a bucket load of Sikaflex all the way along the tube and pushed a load in before pushing it home on the inside of the boat and a bucket load more pushed in on the outside before screwing on the cutlass holder.
I had to dress the face of the stern post as little as the cutlass bearing holder wasn’t sitting quite flat on the face of the stern post.
The tube was a fraction too long so had to trim it down a little…. lots of trim, cleaning of threads, test fit, trim clean threads and test fit. In a ideal world we would have had a nut of the correct size to screw on the threads before trimming this would have cleaned up the threads by unscrewing it- but that would have been a another big expense.
Before we fitted the gland we checked if the shaft was sitting centrally in the exit hole from the tube on the inside of the boat. Minor adjustment to the engine mounts are required. This isn’t a complete alignment check but should get it close enough for now.
The new gland is scarily simple. The seal between the shaft and the gland is a beautifully made bit of stainless that buts up to a graphite piece with a shiny surface. The rubber boot is used as a spring to push the graphite part against the stainless collar. The collar is clamped onto the driveshaft with 2 pairs of grub screws, 2 lock onto the shaft at 90 degrees to each other. The other 2 follow the other 2 in to lock them in, all 4 have Loctite on them.
New graphite gland in position. This is self-lubricating, so there is no need to use the grease stuffer. The unit seals against water ingress where the stainless and graphite rings bear on each other. The two are kept in contact by the compression force provided by the rubber boot. Water is injected (from the engine coolant) into the gland and hence along the tube to the cutlass bearing; water can also reach the bearing through the two external inlets.
The bellows have to be compressed by 20mm which is easier said than done down there!
Note the extra security of the hose clamp just in case the 4 grub screws come loose!
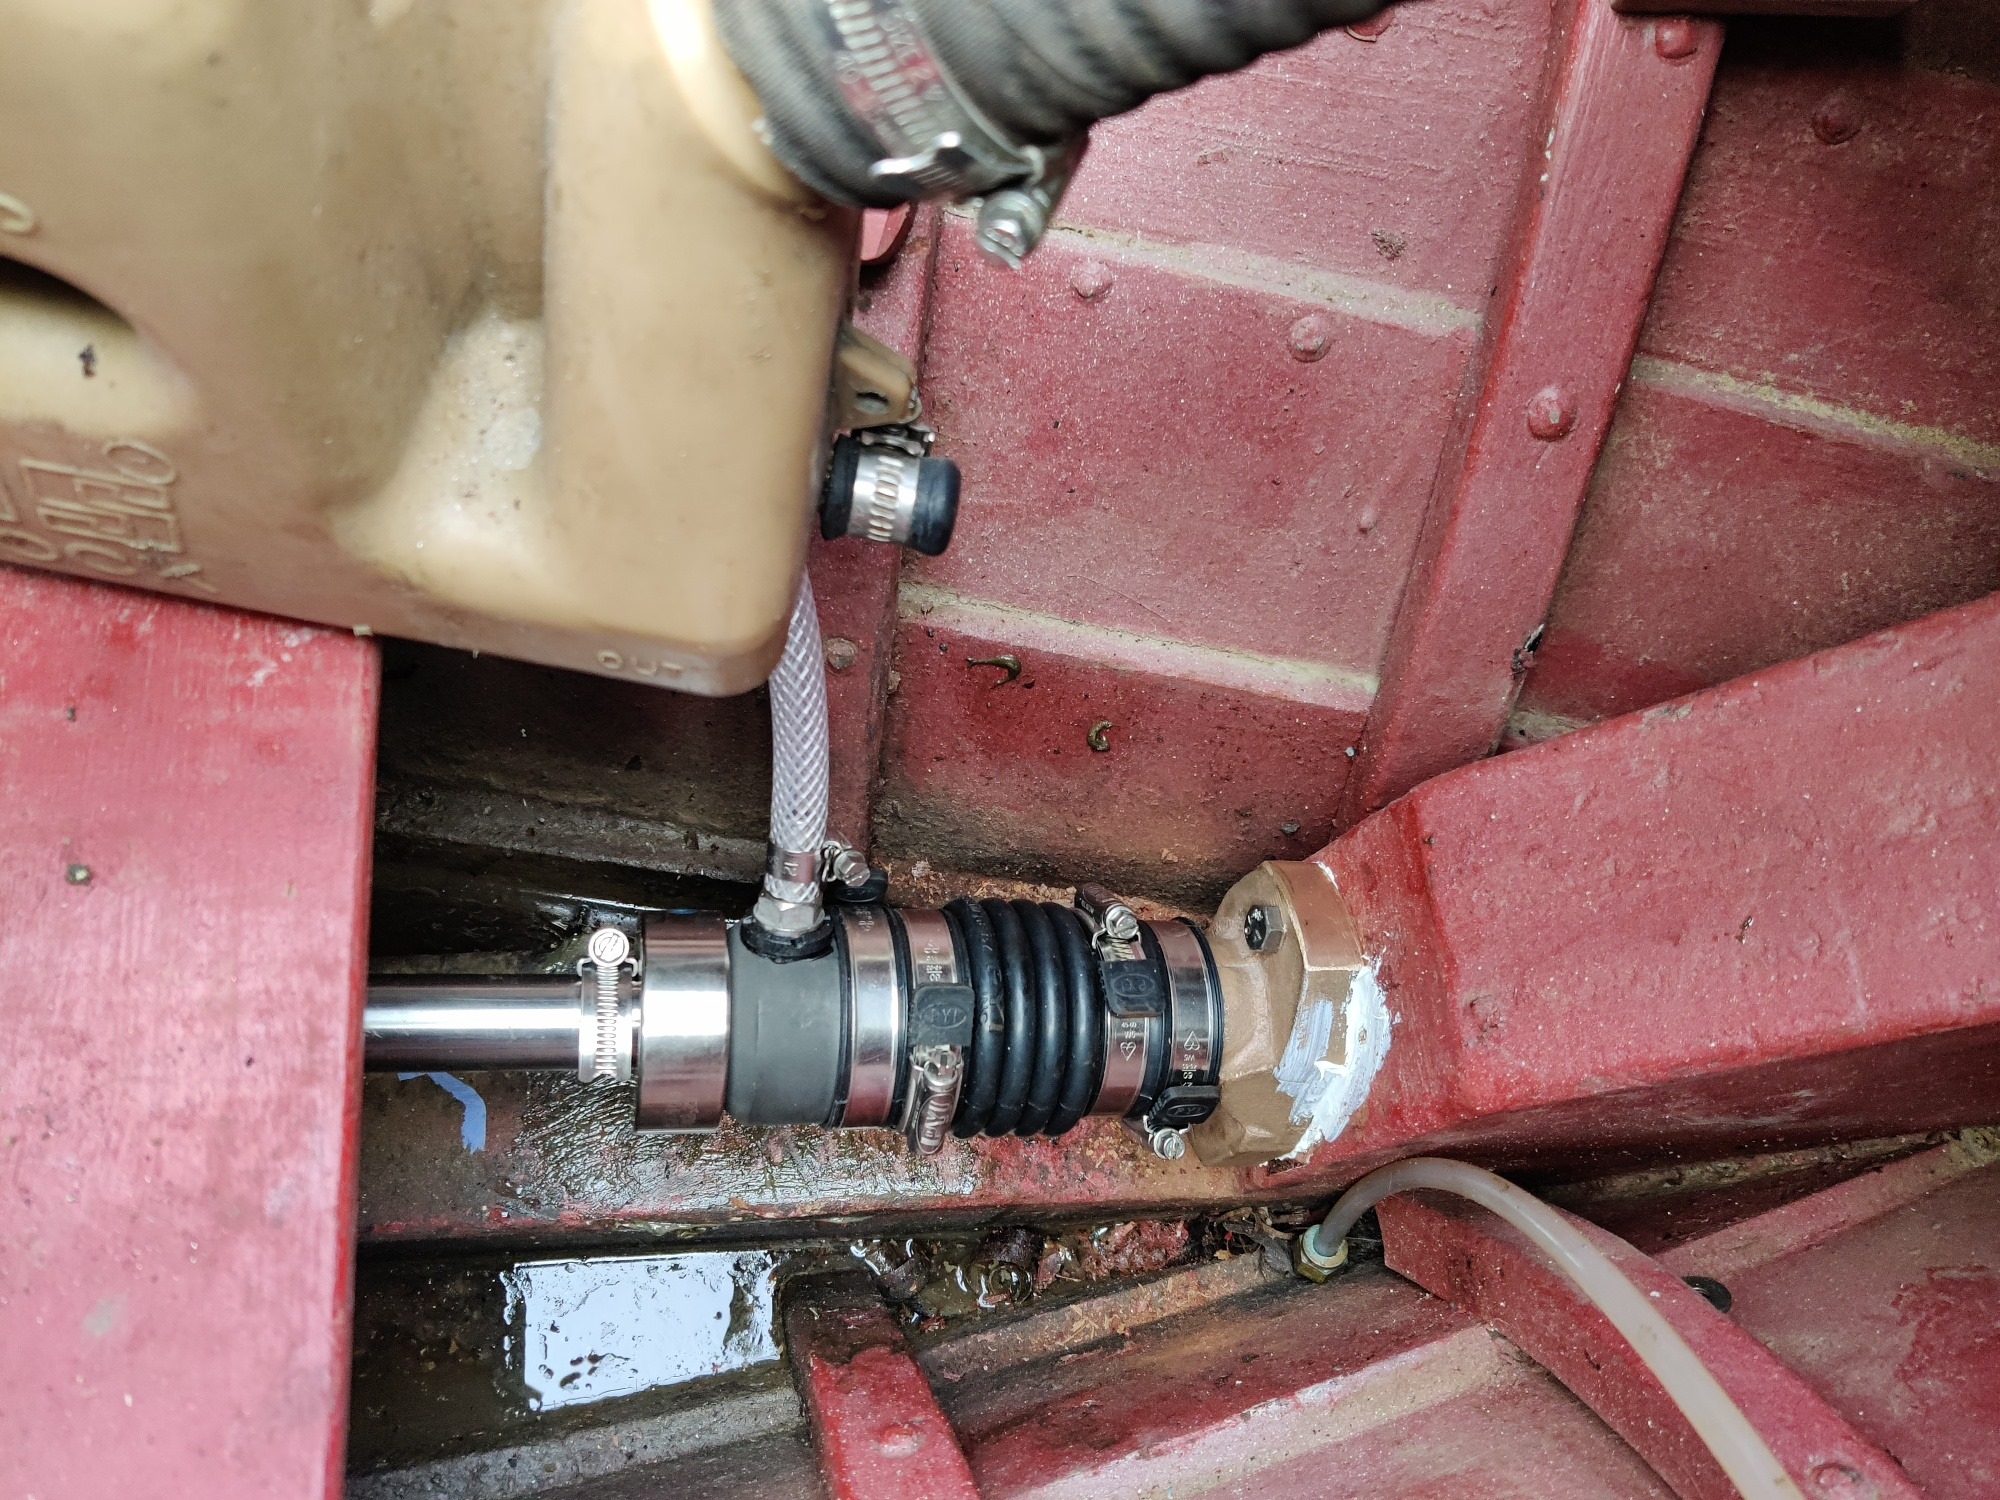
Last job was to fit the water feed. A T piece of the water feed out of the engine to the elbow down to the gland and she’s done enough ready for the water.

The water hose from the exhaust manifold to the exhaust elbow is split to provide a feed to the graphite gland.
Follow Ade’s restoration of Tig at Saving Tig | Facebook .

